#ive never wrote up a tutorial before so hopefully this makes sense :')
Explore tagged Tumblr posts
Note
Hello! I’m the anon that was curious about your p3d process from before 🙌
First of all, tysm for such a quick reply and oml pluto soda mentioned!! Their tutorial was one of the first few resources I came across when I was first starting out. Their models are absolutely adorable! The cottencandy robot is my fav (the one with a pink and blue color scheme) However, as much as I love their tutorial, I did find that due to the character they choose having a hood on (i’m assuming) and the tutorial jumping forward sometimes, it makes it a little difficult to design the back of the model (the hair especially.) The back of all my models looks like such a big mess cause of the hair haha. That’s why I was wondering about your workflow and how you go about making your models! Your shading style is super cute and i’d love to know more about how you pick your colours!
I really love this one model of yours in particular cause of the design of the face. (linked below, the one with purple hair) One thing I really like about your style is how you use shading to create depth and add more details to the design instead of adding a ton of different shapes (which given this is p3d we're talking about . . . oof the software would crash a dozen times)
-> For example: Teto’s hair + highlights in this model, and the design of her skirt is such a unique approach! 1) https://www.tumblr.com/meowonaise/757822097302110208/revenge-for-tomatolamp?source=share
2) https://www.tumblr.com/meowonaise/766338194550685696/paint3d-teto-for-teto-tuesday?source=share
If you feel comfy, pls do share your secrets! Or atleast a few hints as to how I should go about to achieve a similar result. Ty in advance
hi anon ^_^!! you mostly mentioned hair + faces so i mostly went with that!! hopefully thats what you meant!! also the most of it is under a read more because it got kind of long >_<
id say my process in making hair in paint 3d art is very similar to how i go about drawing 2d art if that makes sense. i block in my colors so after i draw the head ill start drawing the front bang, side hair pieces, and then back hair pieces. im not quite sure whats the best way to explain so heres tetos hair all broken up
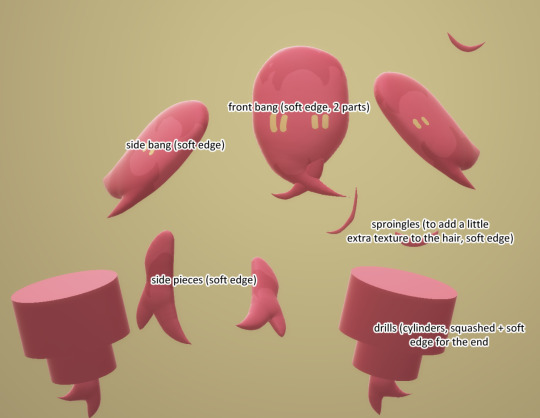
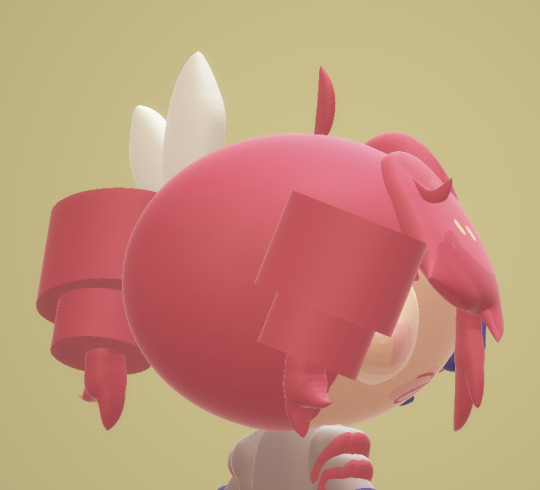
it varies a lot from what character you want to draw but teto only has her front hair and pigtails so theres not too much going on with the back hair (i just colored in the back of her head, which is a sphere, with the marker tool)
for the maya fey plushie + a plushie of @/machamess's oc kapri sun the back hair is just one really big shape drawn out w the soft edge as well. which doesnt really look as detailed or have a lot of form to if you drew out and fiddled with a bunch of pieces, but it works perfectly for my purposes !!
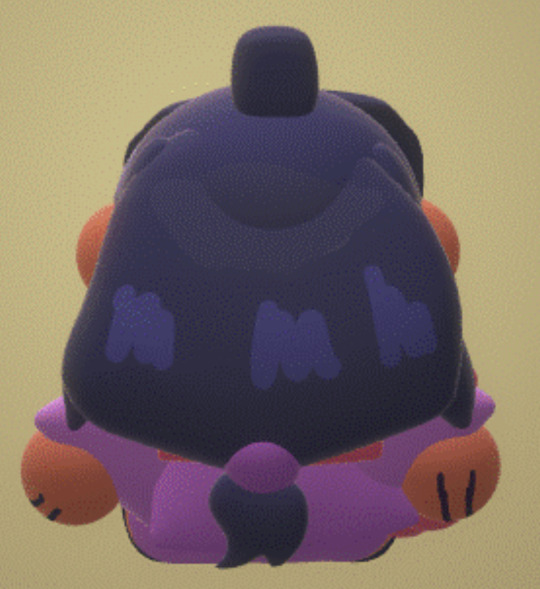
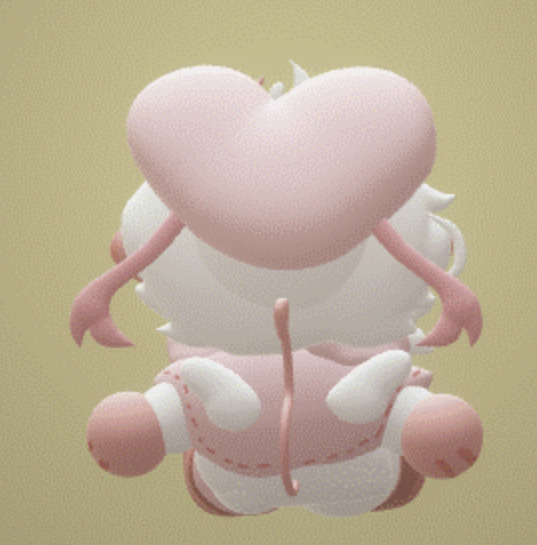
^^ignore how crunchy these images are i moved computers and didnt transfer over my paint3d models so i had to screenshot gifs of them. but hopefully theyre clear enough!
and you can see there that on mayas hair the highlights are painted in!! which is also drawn in the same way that i add highlights to hair in 2d art. i think it makes up for the fact that their hair is completely flat and gives it a little depth!
but again it varies from the hair your trying to make!! like for example heres a model of mirabelle of in stars and time fame. unlike the other characters who all had straighter hair she has a kinkier hair texture, so her hair is comprised of spheres with her hairline being drawn in with a marker instead. it probably isnt very realistic but i think it works for a cartoony style with no textures ^_^
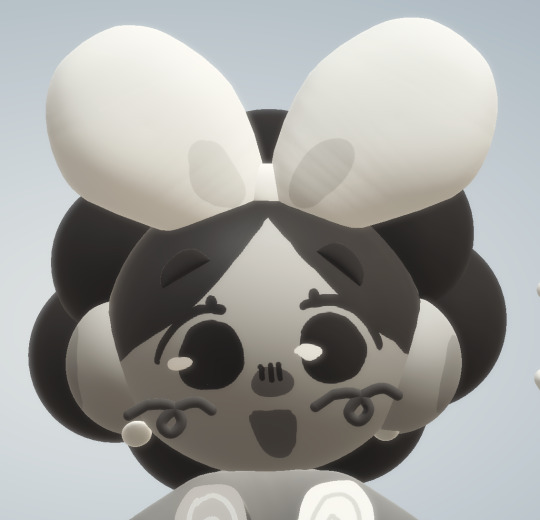
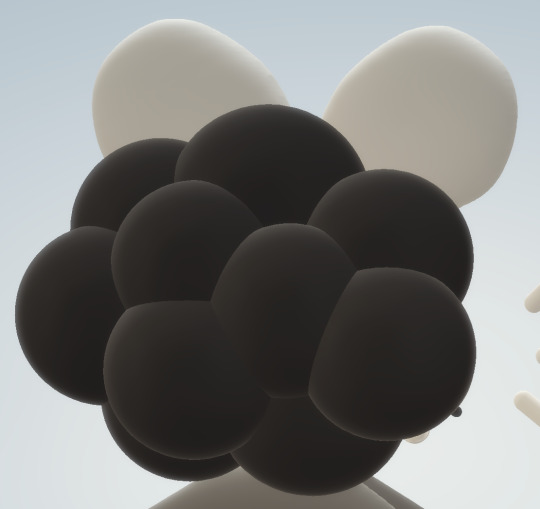
as for skirts i dont really have much advice unfortunately :( i made a teto model because i was thinking and i was like wait..... i could make tetos synthv skirt in paint 3d and then i did it. but its the semi circle shape with squares drawn with the soft edge! tetos design is a bit unique in that she only has 4 flaps in her skirt which could definitely apply to some characters but not all? but on the mira model her skirt is made up of long, almost triangle shaped slabs to get the pleated effect. theyre less squashed to get a more fluffy shape that i like to draw mira with ^_^

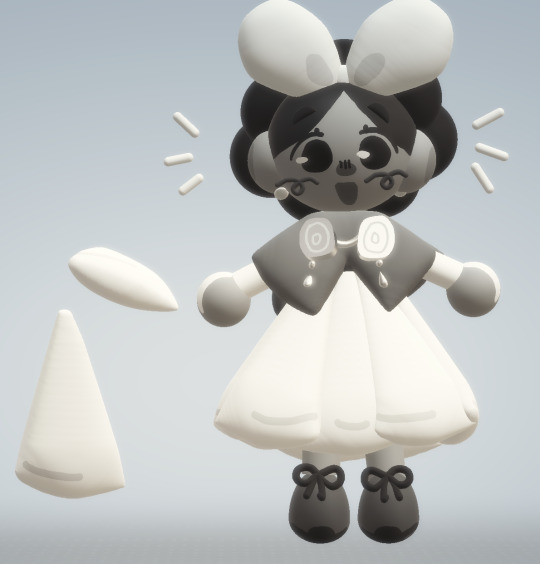
anyways i dont think theres a better way to go over this so:
the step by step tutorial part (for the face + hair)

heres the base for the headshot which is just a sphere for the face, semicircles for the body and ears and a capsule for the neck. theres not much to see for a full body model since its basically the same as plutosodas. were going to make this a gumi megpoid because i think her hair is fun to draw :) also i forgot to sketch it out first so i urge you to not be like me and sketch things out first.
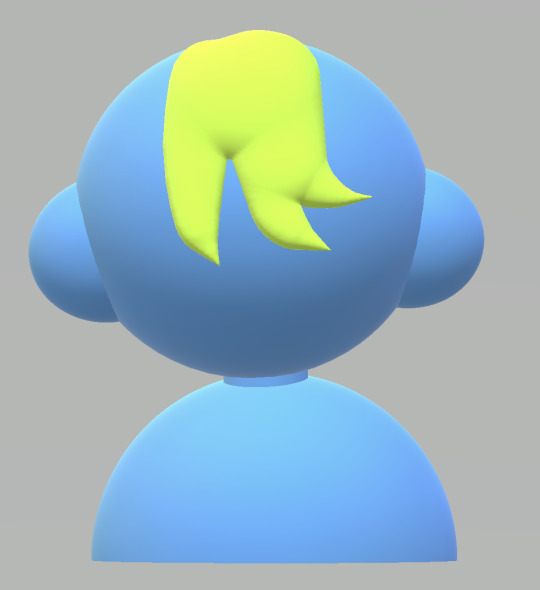
front bang, done in light green for clarity
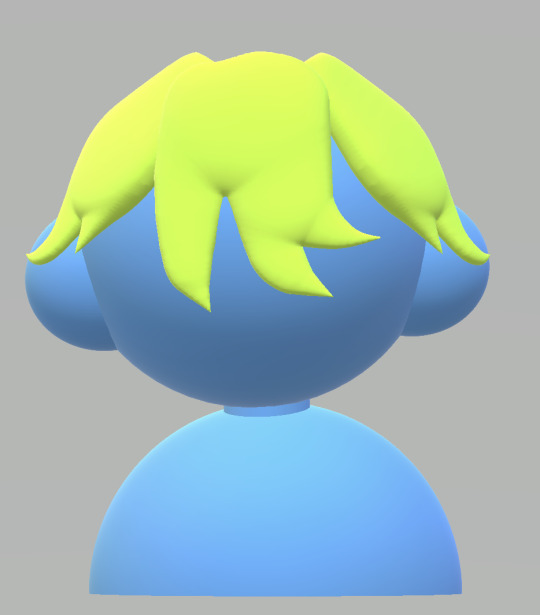
side bangs. here i start thinking abt the general shape, here i want gumi to have an exaggerated indent on her head so the side bangs are shaped as such. i also elongated her front bang to frame the face a little better.
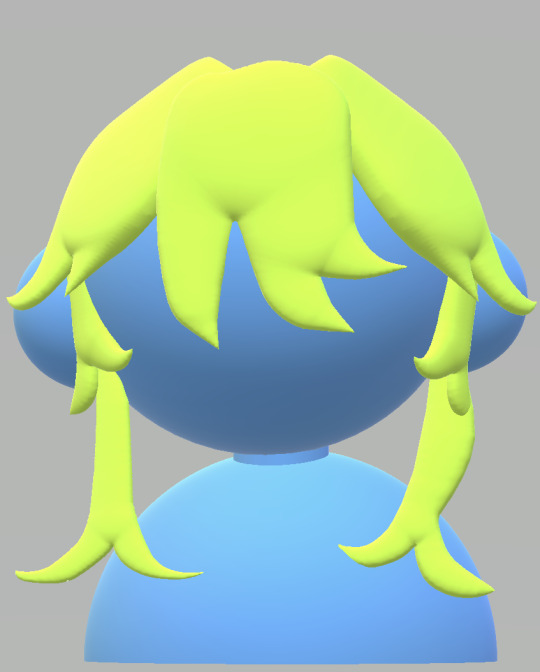
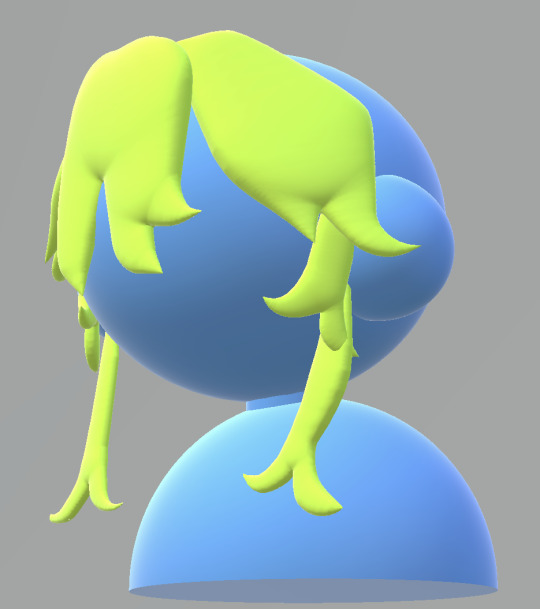
side hair thingies! the closer ones around her ears are a bit sideways to wrap around her head a bit more. i also made her side bangs a bit bigger to frame the face better. theres a lot of shifting things around i realize!
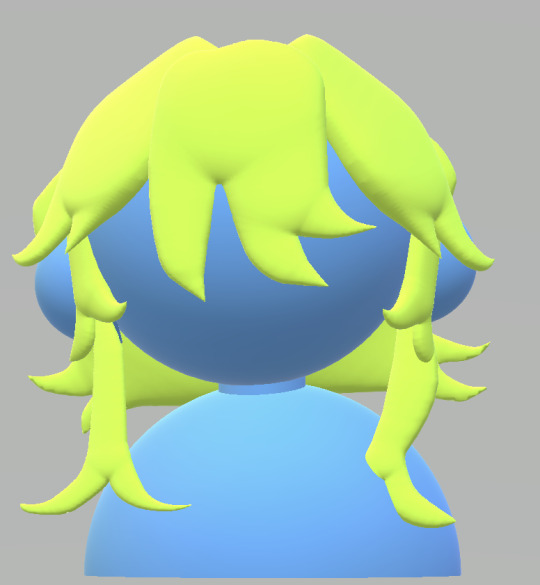
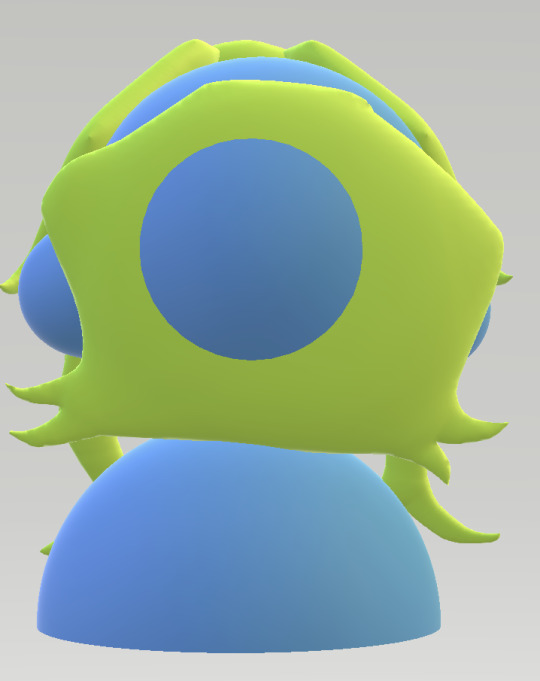
back hair time! its just a really big soft edge shape. you maybe see the the hair clips into the back a little. well paint it over during the painting process! also i made her head smaller here.
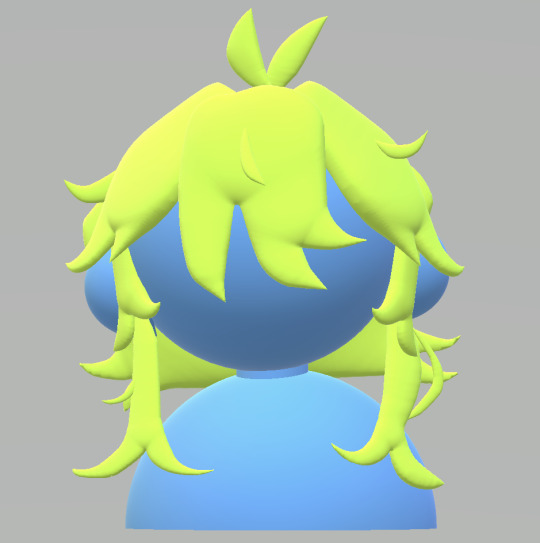
extra stray bit of hair! ill move onto the painting now, but ill probably add and change more later.
ok so there is not really any logic i follow when picking colors. i just usually pick my favorite ones. for the dono model (purple haired character you linked) i color picked their colors from their reference (made by @/tomatolamp on here who also does really cool art!!!!! including 3d stuff!!!!!!) but ill try to explain my coloring style a bit ^^
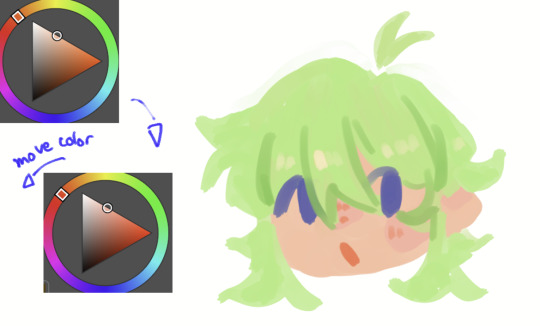
as said before my painting process in paint 3d is nearly identical to my 2d art so heres a gumi really quickly done in clip studio. for blush, i always like to move the color wheel closer to the red/pink area, maybe make it darker for really pale skin, and use a darker/more saturated red to draw in the blush + imply a nose bridge. for highlights i always go for something that stands out against the hair color, which yellow is always a safe choice for but anything that contrasts nicely will work for me!
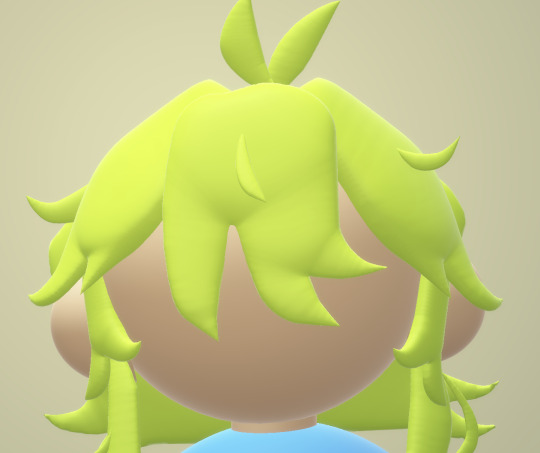
heres her skin tone all colored in. i also changed the lighting to the sand filter to be more pleasing and not so washed out and gray
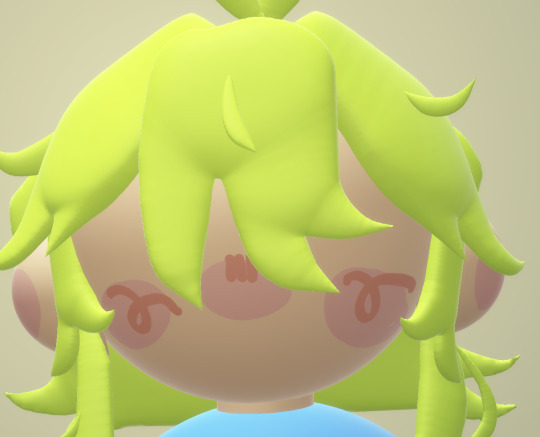
blush + lines!
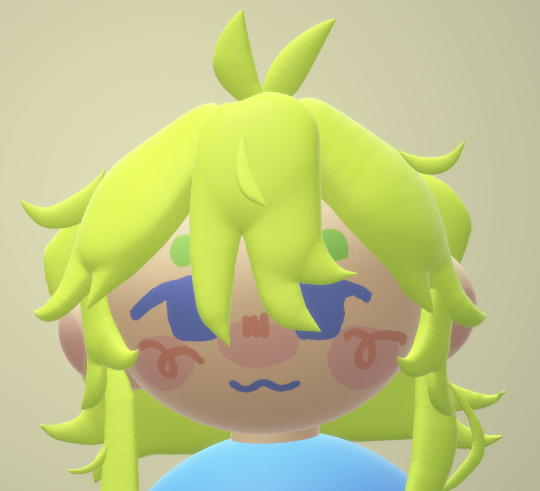
face!! i like to draw on the eyes and mouth with blue cuz i like to use blue lineart when i do it.
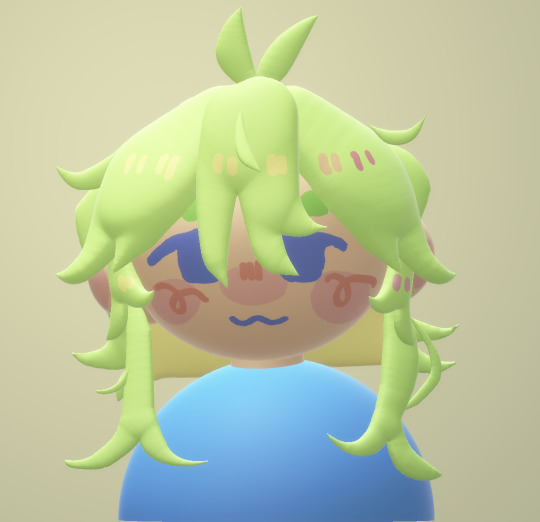
hair colors time!! i changed the hair to a more pleasing green and changed the inside hair to yellow and added highlights. i got the gradient effect by simply moving the color slider from yellow to pink with stopping in between to get the middle colors.
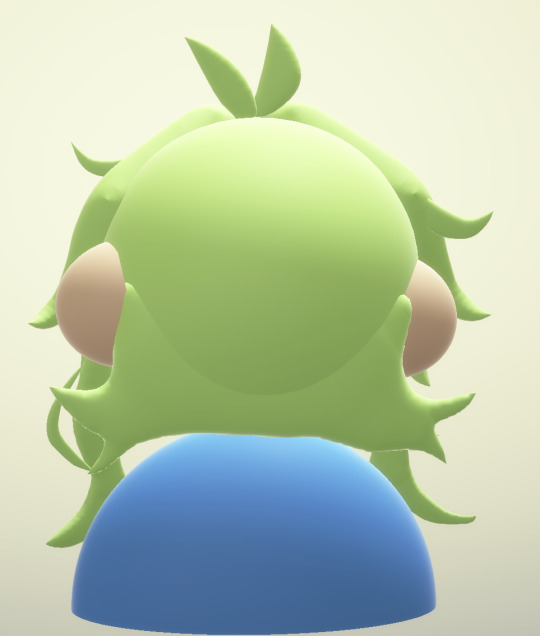
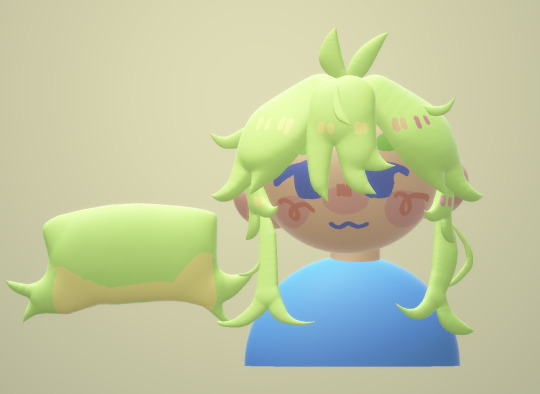
i decided to redo the back so that it doesnt have a top part so it goes into the head a bit nicer. i traced over the original back part to keep the same shape :)
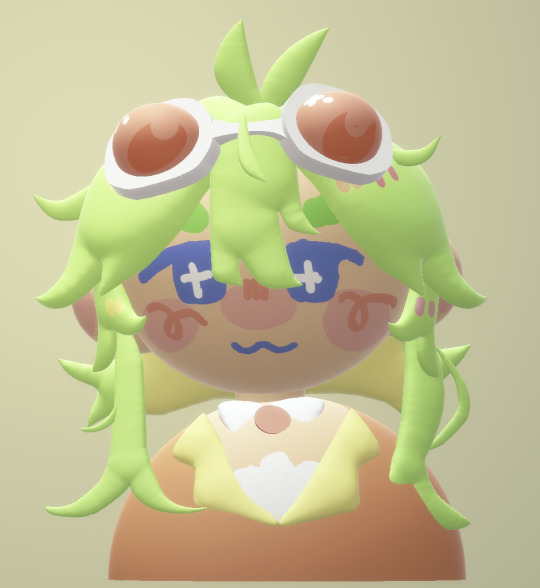
clothes time ^_^ her goggles are 3 hard edge shapes (2 for the eye parts, one for the bridge) and 2 semi circles and her collars are soft edges. also i added sparkles in her eyes and redid for front bang bc it was spaced out in a way that bothered me (this could have been avoided if i did a sketch. dont be like me) (and also i realize now i forgot to re add the highlight. oops)
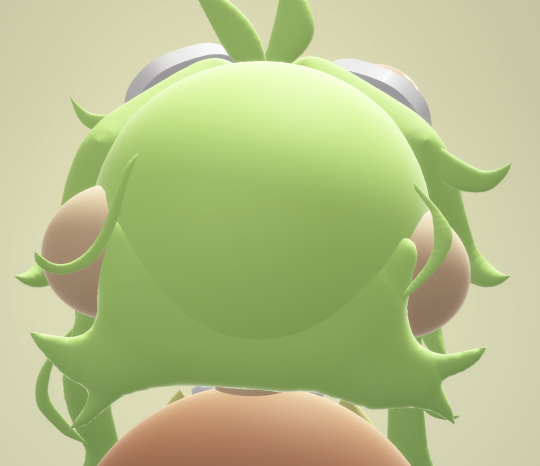
also added some more stray hairs to the back to add more texture!! here i also tried to make things a bit more symmetrical and make sure that nothing looks too off from the other angles. its mostly just shifting things around!
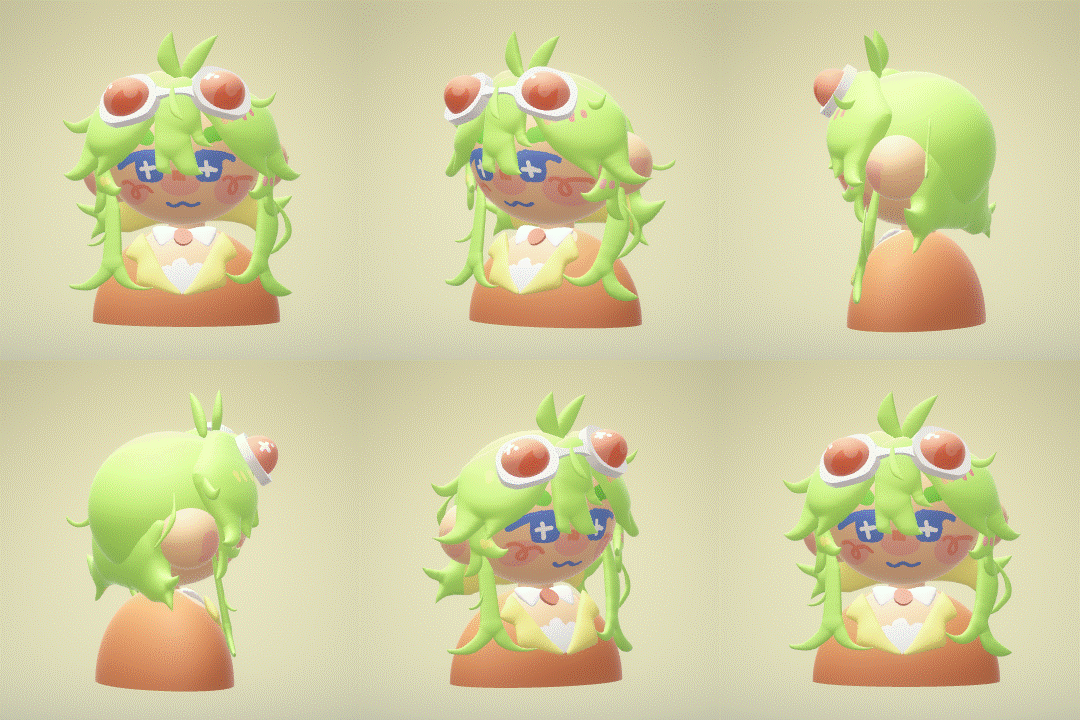
and there you have a full paint3d model!! shes still a bit messy on some parts so i would probably fiddle around a bit more if she was a full model but thats the gist of it. if i skipped over anything or you still got further questions dont be afraid to ask :)!! happy paint3ding!!
#ive never wrote up a tutorial before so hopefully this makes sense :') ?? im also not great with words so sorry if its hard to follow >_<#meowart#mailbox#paint 3d#<- maintagging bc this might be useful for others !!#also it seems like this post has trouble having images side by side? does that happen if you add a read more link? huh
2 notes
·
View notes